Pages

Showing posts with label fiber art. Show all posts

Monday, September 26, 2011

The Gift of A Creative Mother: Guest Post by Cami Smith

 Hello! Here we are at the start of another week.  I hope your weekend was whatever you needed it to be.  Mine was hectic, but good.  So to get inspired and start out our Monday,  I am really excited to introduce you to one of the amazing women that I have recently gotten to know through my sponsorship swap project.    Meet Cami Smith.  She is the voice and heart behind her blog Colorsmith and an incredible fiber artist (all these amazing works are hers!).  She also Art Journals and does beautiful Mixed Media work as well.
Cami has a heart for art making and has done so her entire life for no other purpose or intention than because it is who she is.  In fact, Cami grew up with a creative artsy mama that taught her about the beauty and passion that living a creative life can offer.
This really struck a chord with me, because as a young mom and an artist, I want my own children to be given the opportunity to discover their creative spirit, and let art making be a part of their lifestyle regardless of whether the world believes they have "talent."  I believe that creative expression is a natural part of being human, and that everyone should participate in it.  So I asked Cami if she would be willing to share a bit about her experience growing up with an artistic mother.  I hope you enjoy her story as much as I did.

"Turpentine in our kitchen cabinets were as common as a box of cereal.  I grew up with an artist for a mother.  All my friends loved coming over to our house. I'm not sure why... certainly not because we had some cookies baking in the oven.  My mother was not one for cooking.  Oh, I didn't go hungry.  Certainly not intellectually.  We just had food that seemed to mingle with art supplies.  
Every thing was a drawing surface to my mother. When she would come home with some groceries, she would stop as she was folding the paper bags. She would tell us to hold still, then she would proceed with her charcoal pencil and start to draw us on the blank part of the paper grocery bag.  Or maybe start drawing the fruit that she just placed in a bowl.  Our kitchen had an on going mural of the fog coming over the San Fransisco Golden Gate Bridge being painted on the wall.  In her bathroom, she drew her self portrait with her eye makeup pencils on many of the tiles around her mirror,.  She had a wonderful collection of self-portraits until the house keeper decided to wipe it clean!  
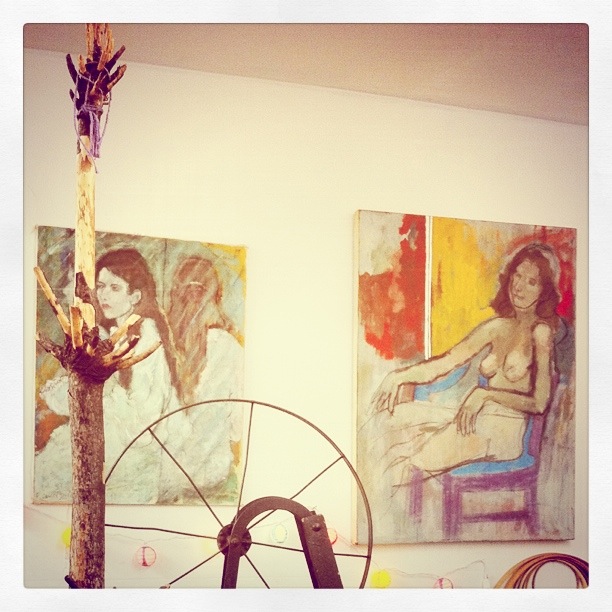
She loved studying wild life and insects.  We always had some creatures in living in terrariums like turtles or tarantulas.  She would often get us up at dawn ( reluctantly) we would go for a bird watching walks and stop to sketch what we saw.  And ... I know this sounds kind of crazy but if she found a dead bird, she would wrap it up carefully and put it in the freezer so she could study it more closely and draw it when she had time.  Yes, dead birds somewhere next to the frozen peas. 
It was not uncommon for her to point out the "negative space" between the trees as we would be driving down the road.   She always took us to classical music concerts, ballet performances, museums, gallery exhibits and operas.  We had a big poster of Beethoven and on December 17,  we propped up it on a chair by the kitchen table.  She would get a cake from the bakery and would sing happy birthday to him.  So our intellect was well fed.  
I have an extreme appreciation for the creative soul.  You might ask, how does this translate to raising my own children?  Well my son is in grad school studying classical trumpet.  My daughter studies ballet with the Russian Ballet company.   But other than the free range chicken I buy at the super market, I don't have any dead birds next to the frozen peas in my freezer!"

(The photos included in Cami's guest post are of her mother (85) surrounded by her found objects, sculptures and canvases in her studio where she lives in Seattle.  All other photos are of Cami's original artworks, as can be seen on her blog).

Thank you so much Cami! I hope to be as creative and inspiring as a mother, as yours was for you.  I highly encourage you to check out Cami's blog and get to know her better.  She is also on Facebook and is an incredibly inspiring person to get to know.

Just a reminder: Only 2 days left to enter the BIG Sponsor Giveaway!  8 incredible prizes by 8 incredible women for ONE winner :)  CLICK HERE TO ENTER! 
XO, HARMONY

Saturday, September 10, 2011

Crafty Saturday Fun: Make a Yarn Bouquet!

Most of my DIY ideas come from the necessities in my own life.  Today's project is no exception.  I have several special birthdays coming up and also have a ridiculous amount of old yarn skeins from past projects (when I thought I was going to be a serious crocheter and turned out it was too hot in Florida to wear anything I made).  So what could I make as a birthday gift that involved yarn?... super cute Yarn Flower Bouquet that's what!
This project was so simple and fast, it seems silly to lay out the steps but for the sake of clarity, here is what I did.  (I do want to apologize for the inconsistency in photo quality, I was having some serious issues with clouds coming and going and constantly changing my light source, but you'll get the idea).

Step 1: Go on a stick hunting adventure in your backyard or local park. (this was my son's favorite part, except he kept finding borderline logs instead of sticks and insisted on lugging them back with us as well.  So you are prewarned, you may need a wagon for this adventure if you are bringing a small friend.)

Step 2: Pick out some fun yarn colors from your stash.

Step 3: Break your sticks down to the sizes you want for the flower stems and wrap with yarn. (you may need to clean them off a bit before you do this).  The wrap technique is simple, tie an overhand knot at the end and start wrapping tightly up, covering the knot tail as you go.  When you get to the top, just tie another overhand knot and cut the yarn.  It doesnt matter if you see a little bit of the stick since it will be covered with the flower.

Step 4: Make Pom-Poms for your flowers.  You can either use the old fashion method of cutting cardboard donuts or use a pom-pom maker, like I did (Previous DIY on how to do this HERE).

Step 5: Grab your trusty Hot glue gun and put a glob of glue on the end that you want the flower to sit, separate the yarn ends with your finger to make a spot for the stick to go as close to the center as possible, and then press the flower on.  At this point, I also added some fun ribbon ties to create a leaf look (felt leaves would also be cute)

Step 6: Arrange however you please.  I had a little glass vase on hand which I filled with scrap yarn and arranged my bouquet in, but they could also be tied together with a cute ribbon for the birthday girl to put in her own style of vase.

There you have it, a simple cheap way to give a gift from the heart that will last so much longer than real flowers.  Plus it's a wonderful way to decorate your home with bright cheeriness when the cold winter months come around.
Dont they make you want to create a whole garden of yarn-tastic flowers!  I kind of want to yarn-bomb people's yards with them, mostly because I love the whole concept of yarn bombing and for some reason the pairing of brightly colored fiber art against the natural world makes me really really happy.   If you have no idea what I am talking about, click HERE for some fun.  

*FYI: I have a few more of the hand painted vintage art journals almost ready and will be listing them later today, if you missed out on the one that sold yesterday.  Dont forget, everything is Free Shipping through Monday in my Etsy Shop.   Have a happy and crafty Saturday!
XO, HARMONY